References
Hironaka NGL, Ubaldini ALM, Sato F Influence of immediate dentin sealing and interim cementation on the adhesion of indirect restorations with dual-polymerizing resin cement. J Prosthet Dent. 2018; 119:678.e1-678.e8 https://doi.org/10.1016/j.prosdent.2018.02.001
Magne P, So WS, Cascione D. Immediate dentin sealing supports delayed restoration placement. J Prosthet Dent. 2007; 98:166-174 https://doi.org/10.1016/S0022-3913(07)60052-3
Schoenbaum TR, Ercus S, Snowden J. Reverse spot bonding: a novel technique for provisionalization with immediate dentin sealing. Compend Contin Educ Dent. 2012; 33:374-277
O Connor C, Gavriil D. Predictable bonding of adhesive indirect restorations: factors for success. Br Dent J. 2021; 231:287-293 https://doi.org/10.1038/s41415-021-3336-x
Top Tip: Efficient provisionalization for posterior indirect adhesive restorations
From Volume 2, Issue 2, June 2025 | Pages 106-108
Article

Posterior indirect adhesive restorations have become increasingly popular owing to their aesthetic qualities, conservative nature, and ability to closely mimic the physical properties of natural teeth. These restorations are favoured for their ability to preserve tooth structure while providing a high level of durability. Despite the numerous advantages, one limitation that has emerged is the challenge of providing provisional restorations. The issue arises because acrylic restorations cannot be used because they would interfere with the bonding process. The luting cement, applied immediately after immediate dentine sealing (IDS), which is still in an immature state, may seep into the inner layers and compromise the IDS' intended function.1 Thus, the challenge lies in how to provide a temporary restoration that maintains the integrity of the IDS while fulfilling all the necessary functions of a provisional restoration. According to Pascal and Magne, a period of 12 weeks can be used for the placement of permanent restorations, provided that an adequate provisional restoration is used during this time.2 The technique of reverse spot bonding (RSB) has been proposed as a solution to this problem.3 The steps involved in performing RSB are described.
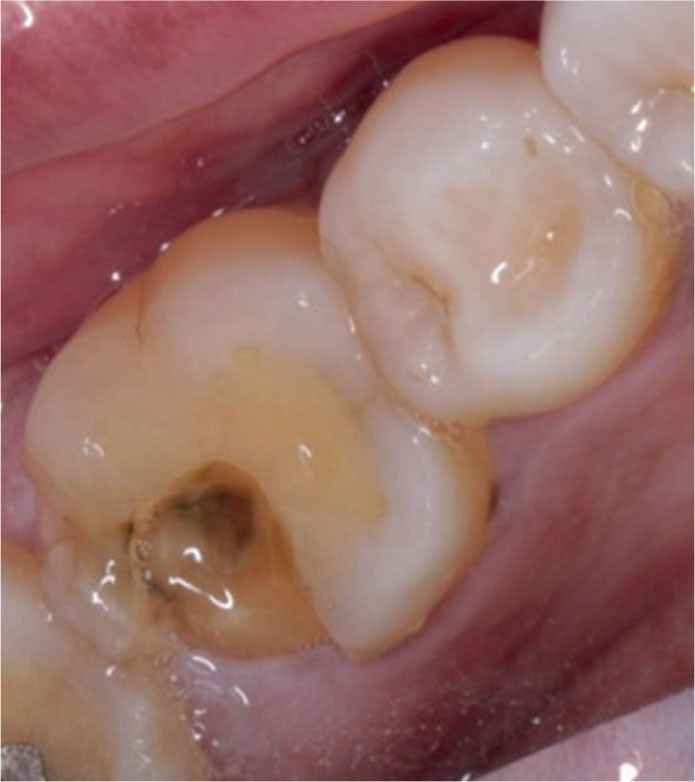
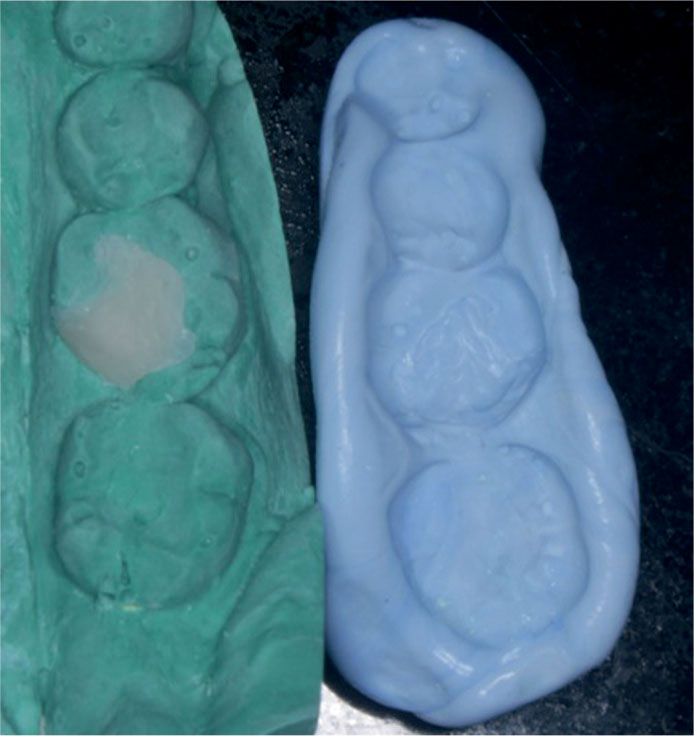
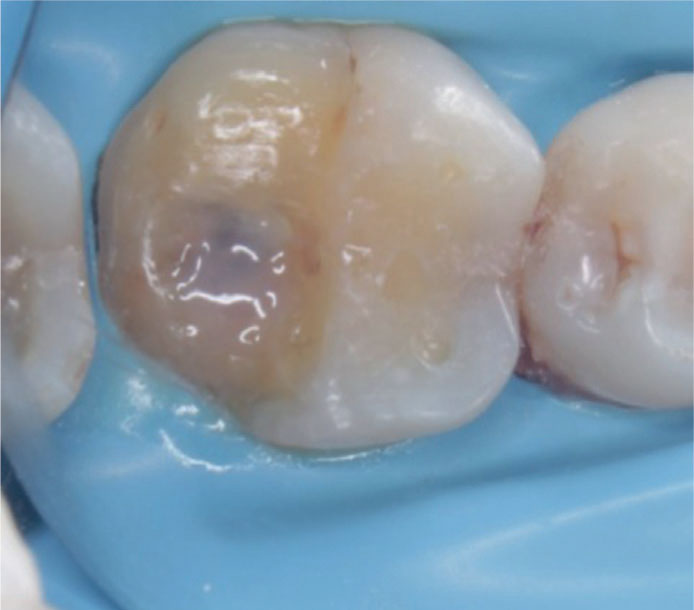
A patient presented with a complaint of a fractured restoration in relation to tooth LR6 (Figure 1). A primary impression was taken to fabricate the diagnostic cast, on which a composite restoration was performed. An impression of the cast was then made using addition silicone (Aquasil Ultra Impression Material, Dentsply, USA). Once the putty had set and was removed, it served as a template for providing the provisional restoration (Figure 2).
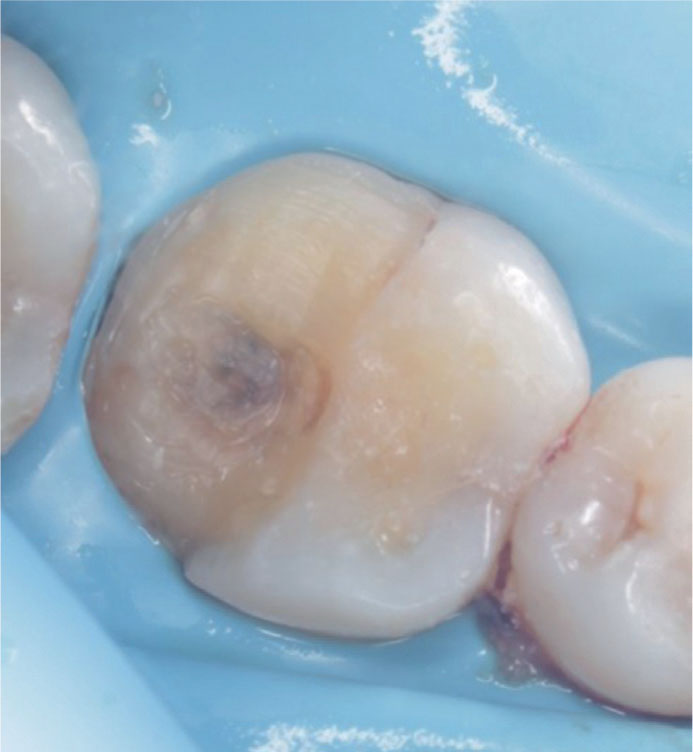
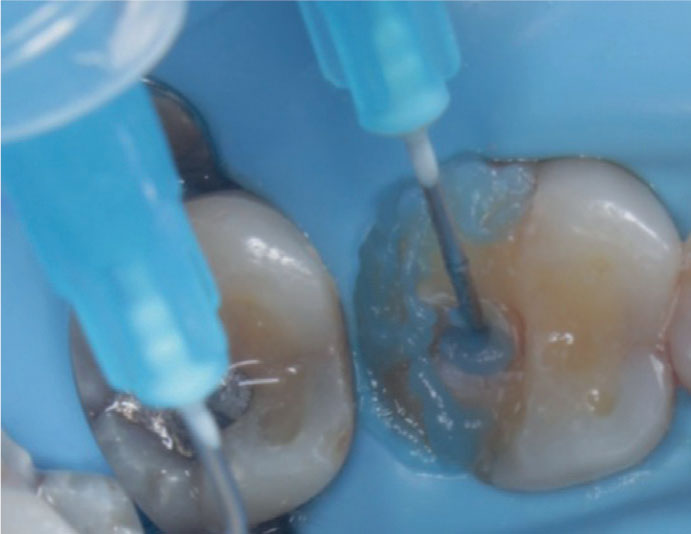
Onlay preparation was carried out, ensuring the removal of all carious lesions (Figure 3). Freshly cut dentine was then etched with 37% phosphoric acid. (Figure 4). Immediate dentine sealing (IDS) was carried out by applying the primer of OptiBond FL (Kerr, USA) to the dentine surface, followed by a gentle air-drying for 5 seconds to allow the solvent to evaporate. Next, the adhesive resin was applied, lightly air-dried, and light-cured for 20 seconds (Figure 5).
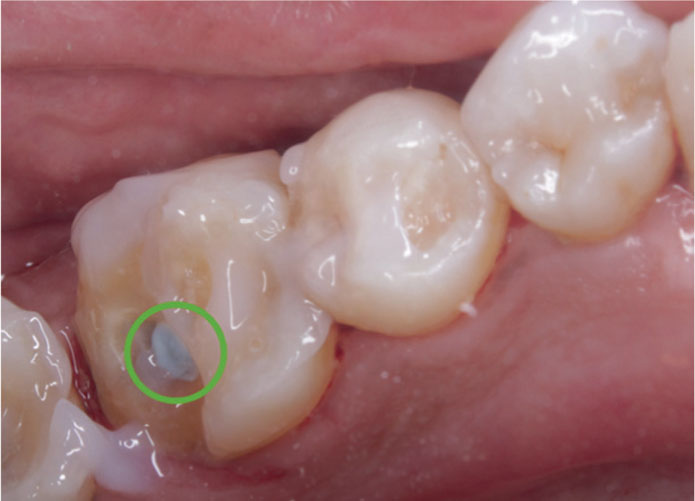
After the final impression was made, a small ball of addition silicone (Aquasil Ultra Impression Material, Dentsply) was placed at the centre of the restoration until it set. The remaining tooth surface was coated with a separating medium (Liquid strip, Ivoclar, Liechenstein). This process ensured that only a small circular area bonded to the provisional restoration, while the rest remained unbonded, preserving the integrity of the IDS (Figure 6). The gingival tissue around the tooth was also coated with separating medium to facilitate easy removal of any excess temporary material using an explorer tip.
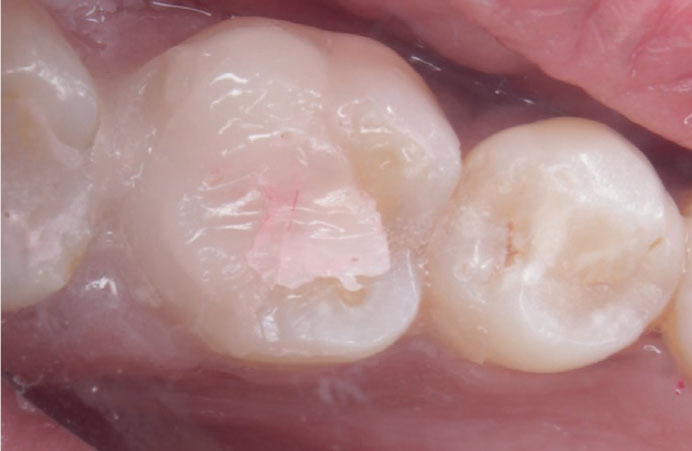
The ball of set putty, initially placed at the centre of the preparation, was carefully removed. Bis-acryl material (CoolTemp, Coltene, Switzerland) was then injected through a syringe into the pre-formed putty index, which served as the template for the provisional restoration. This template was positioned over the prepared tooth and allowed to set completely. After complete setting, occlusal adjustments were made as needed. Any excess material on the gingival tissues was gently removed using a probe, ensuring proper harmony between the gingival tissue and the restoration margins (Figure 7).
Once the final restoration is ready, the temporary restoration can be removed by lifting its edges or splitting it with a bur, followed by gentle separation using an instrument. After removal of the provisional, both the intaglio surface of the final restoration and the prepared tooth were conditioned for final cementation. The intaglio surface treatment involved sequential etching, first with hydrofluoric acid and followed by phosphoric acid. The restoration was then thoroughly rinsed using an ultrasonic bath. After drying, a silane coupling agent was applied, followed by a dentine bonding agent.
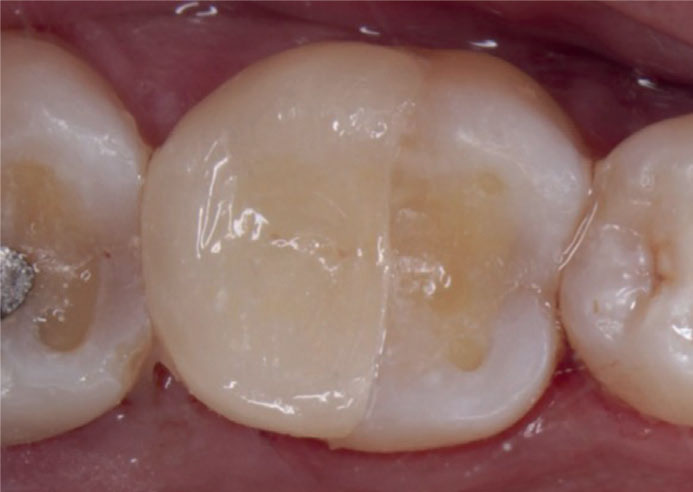
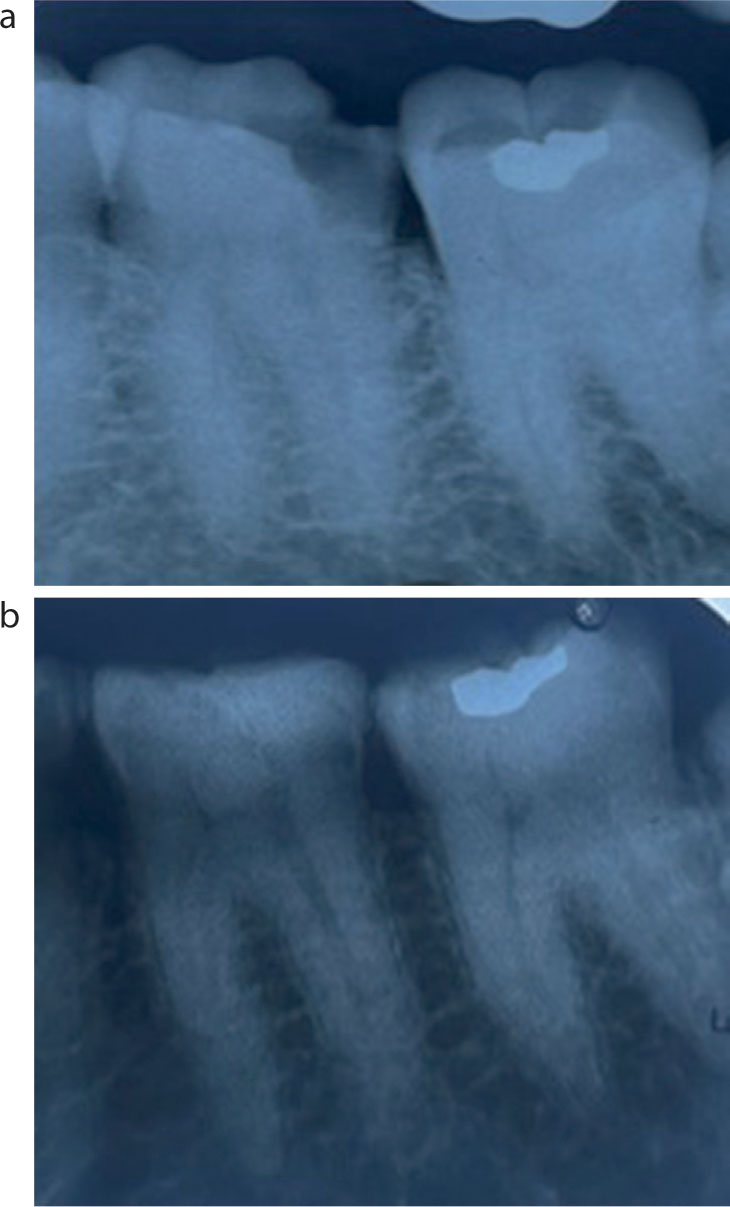
For the tooth surface, intra-oral air-particle abrasion of the substrate was performed (Figure 8). This step helps remove biofilm, stains and any temporary cement residues.4 The entire prepared tooth surface was then coated with a bonding agent ensuring it remained wet, but was not polymerized. A light-cured resin cement was dispensed onto the internal surface of the restoration. The final prosthesis was then seated onto the prepared tooth surface (Figure 9). The pre- and post-operative X-rays are available for reference (Figure 10).

The provisional restorations stayed spot-bonded for 10 days until the final restoration was placed. At the 1-year follow-up, the patient reported no pain or discomfort, and the restoration remained securely bonded.
As an alternative to the technique described above, there are several other methods available for creating a template. One approach involves performing a direct restoration on the tooth and then taking an impression to fabricate the matrix. Another method includes capturing an intra-oral scan and using it to 3D print the template, which can then serve as the matrix. Ultimately, any suitable technique may be employed to fabricate a matrix for temporization; however, the critical emphasis should be placed on the use of the reverse spot-bonding protocol. This approach allows for effective provisionalization while simultaneously enabling the clinician to harness the full benefits of immediate dentine sealing, without compromising either outcome.